TestLink is a web-based test management system that offers support for test cases, test suites, test plans, test projects, and user management, as well as various reports and statistics. It is developed and maintained by Team Test which facilitates software quality assurance.
Additional facilities
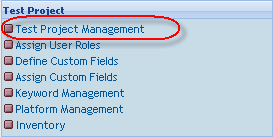
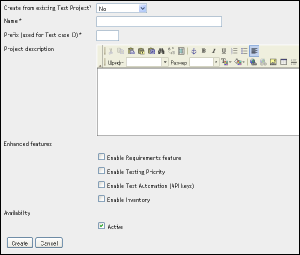
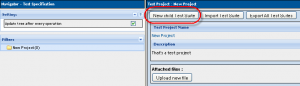
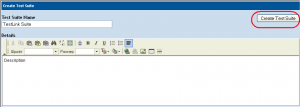
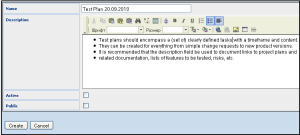
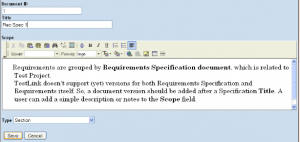
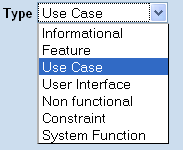
To create a project, go to the Test Project Management section:
![]()
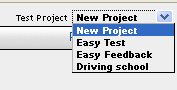
Or here:
![]()
![]()
![]()

![]()


![]()
![]()


![]()
Or here:

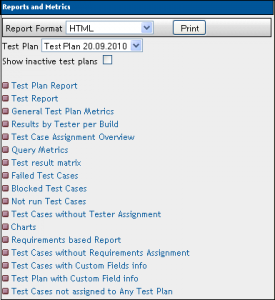
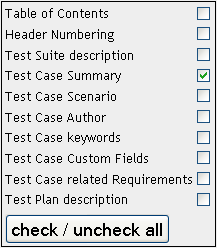
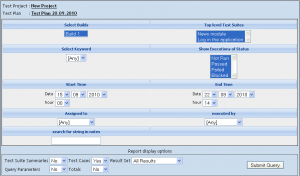
Test Plan Report – the document has options to define the content and a document structure. You may choose the info you want to get.
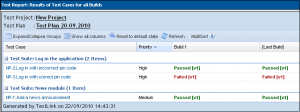
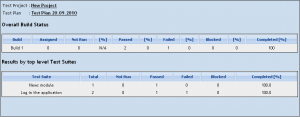
Test Plan report (part of it)
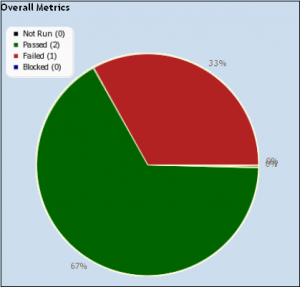
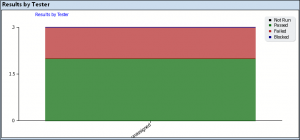
Charts – results by tester (there are only unassigned test cases in the diagram)
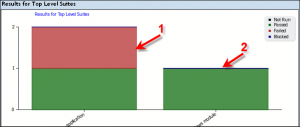
Charts – Results for top-level suites:
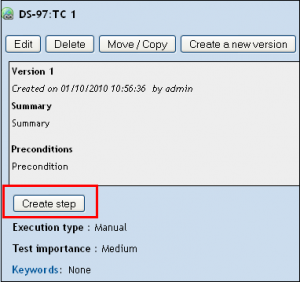
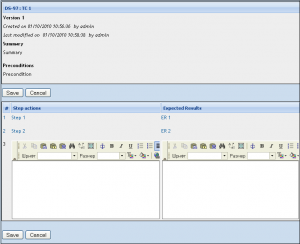
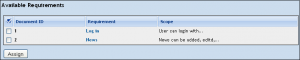
1. Log in to the application
2. News module
Blocked, Failed, and Not Run Test Case Reports
These reports show all of the currently blocked, failing, or not run test cases.
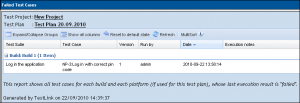
E.g.
General Test Plan Metrics
This page shows you only the most current status of a Test plan by the test suite, owner, and keyword.
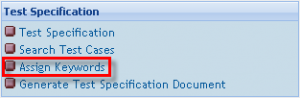
ADDITIONAL FACILITIES – ASSIGNING KEYWORDS
Go to the “Assign Keywords” section
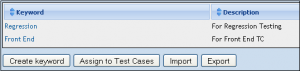
Select some Test Suite and then you will be able to go to “Keywords Management”

Add keywords if there are no KW at all, or if there are no KW you need

![]()
Or in this:
![]()
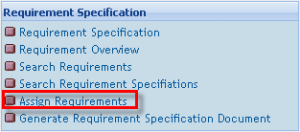
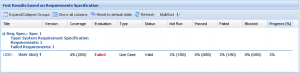
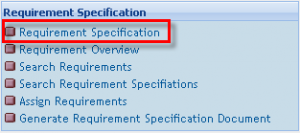
Select Test Suite or Test Case and assign it to 1 or more requirements
(R. can be assigned to TC in relation to many-to-many)
![]()
1. We have all the documentation structured and organized.
2. We solve the problem of version control.
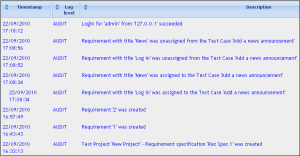
3. We can control the testing process (Events log + different kinds of Reports)
4. We can see if all the requirements are covered with Test Cases.
5. We can select Test Cases for Regression Testing.
6. We can see the results of testing in a very clear and easy-to-use form.
Have questions? Contact the software testing experts at InApp to learn more.